I think the prototype process is the first step to creating a great site. It is critical if you are making a custom site. It helps you think through the user experience and answer things like “what happens if I click on this.” There are a ton of tools out there. The method I used to create a prototype was really easy and created a prototype so good that people often think the site is already built when they look at the prototype. I think there are basically three steps to prototyping. Some people just do one but I think three is really helpful for the site creator if you do all three. If you go through each of these steps, not only will you give the developer solid PSDs, but he can see how they interact with each other.
Step One: Mockup Wireframe
This step is where you think through UX and UI. Some people think you should keep this step as free from design and work only on function. I think the real answer is somewhere in the middle. You can use tools like Balsamiq to make a really simple wireframe, but I really liked using Axure. At $289, it is much more expensive than Balsamiq’s $79, but you can use photos and make the wireframe look really close to what you think the final version should look like. You can also see what a shitty designer you are. You can see my wireframe here. After step two, I am embarrassed to even show it, but it really goes to show what a good designer can do.
Step Two: Design with PSDs
This step is the step that is going to make the site look good. And you are crazy if you don’t hire a good designer for this. To put “good” in perspective, I paid a designer $75/hour. If you don’t know where to find designers, Dribbble is a great resource. This should get you PSDs for each page. If you look at a source like oDesk, you will see most front end developers are building from PSDs. Getting the front end built from PSDs is really cheap, too. In my opinion, spend the money for a good designer and save money on the front end. You can find good front end developers for about $10 an hour if you are comfortable with going overseas. And if they have good PSDs they will know exactly what to do.
Step Three: Make a Final Prototype
This is the fun step. Once you have all the PSDs, you can upload them to InVision. There is a free version, but it is worth it to pay for the Pro version while working on the prototype with the back end developers. With the pro version, you can download and host the prototype. You can see my prototype here. You can link all the pages together so a developer can see what page they go to when they click on a link. It begins to break down if you have a function. For instance, if you a list that you sort and filter. It will, however, let the developer see the bulk of links between pages.
Conclusion
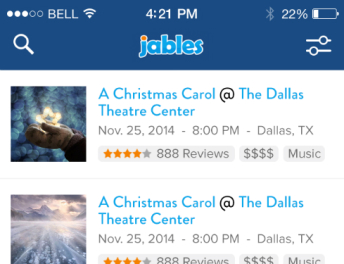
After using this process for the main site, I used these three steps to make a prototype for the mobile app, and I couldn’t believe how quick the process was. I think the mobile prototype is amazing. I would be comfortable showing that to anyone.